
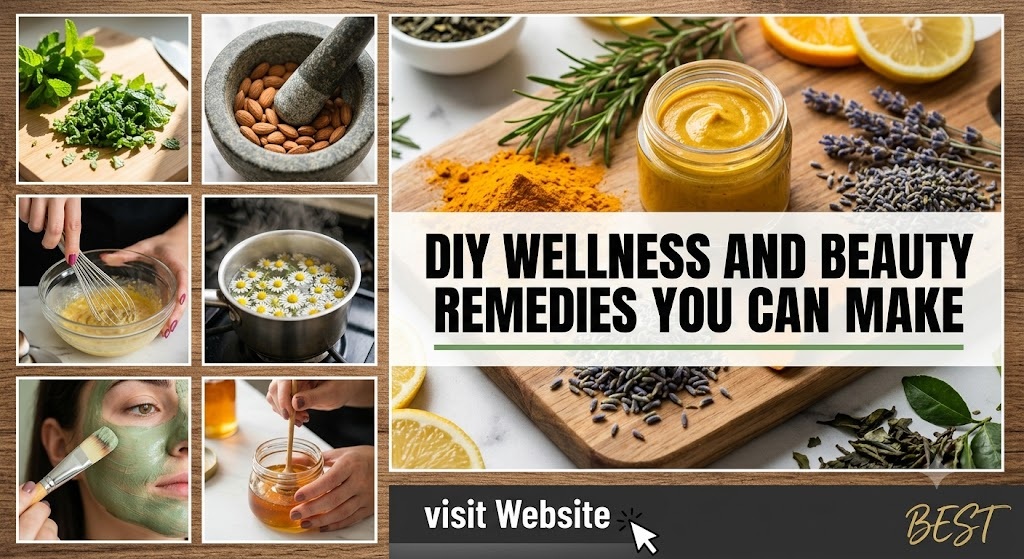
DIY Wellness and Beauty Remedies You Can Make
The Ultimate Guide to DIY Wellness and Beauty: A Journey into Natural Alchemy
This comprehensive guide explores the vast landscape of DIY wellness, from the science of skin-loving oils to the restorative power of herbal elixirs. Whether you are a minimalist looking for a two-ingredient moisturizer or a hobbyist ready to whip up complex botanical salves, this article provides the foundational knowledge and the specific recipes needed to transform your home into a sanctuary of health.
DIY Wellness and Beauty Remedies You Can Make at Home
Natural wellness and beauty remedies are a simple, affordable way to care for your skin, hair, and overall well-being using ingredients already found in your kitchen. These DIY remedies are easy to prepare, free from many harsh chemicals, and can become part of your weekly self-care routine. While natural ingredients may support healthy skin and hair, they are not a substitute for medical treatment. Always perform a patch test before applying any new remedy to your skin.
1. Honey and Oatmeal Face Mask
Ingredients
- 2 tablespoons rolled oats
- 1 tablespoon raw honey
- 1 tablespoon plain yogurt
- 1 teaspoon warm water (if needed)
How to Make
- Grind the oats into a fine powder.
- Mix with honey and yogurt.
- Add a little warm water until smooth.
How to Use
- Apply evenly to clean skin.
- Leave on for 15–20 minutes.
- Rinse with lukewarm water.
- Use 1–2 times per week.
Benefits
- Gently exfoliates dead skin cells.
- Helps soothe dry, irritated skin.
- Leaves skin feeling soft and refreshed.
- Honey supports skin hydration.
2. Coconut Oil Hair Treatment
Ingredients
- 2–3 tablespoons virgin coconut oil
- Optional: 2 drops lavender essential oil
How to Make
Warm the coconut oil until it becomes liquid.
How to Use
- Massage into the scalp and hair.
- Leave for 30–60 minutes or overnight.
- Wash thoroughly with shampoo.
- Repeat once a week.
Benefits
- Helps reduce hair dryness.
- Improves shine.
- May reduce breakage.
- Nourishes the scalp.
3. Green Tea Facial Toner
Ingredients
- 1 green tea bag
- 1 cup hot water
- 1 teaspoon aloe vera gel (optional)
How to Make
- Brew the tea for 5 minutes.
- Let it cool completely.
- Mix in aloe vera if desired.
- Store in a spray bottle in the refrigerator for up to one week.
How to Use
- Spray on clean skin morning or evening.
- Allow it to air dry.
Benefits
- Refreshes tired skin.
- Provides antioxidant support.
- Helps calm mild redness.
- Gives a cooling sensation.
4. Sugar and Olive Oil Body Scrub
Ingredients
- 1 cup brown sugar
- ½ cup olive oil
- 5 drops lemon essential oil (optional)
How to Make
Mix all ingredients until evenly combined.
How to Use
- Massage gently onto damp skin using circular motions.
- Rinse with warm water.
- Use once a week.
Benefits
- Removes dead skin cells.
- Softens rough elbows, knees, and feet.
- Leaves skin smooth and moisturized.
- Promotes healthier-looking skin.
5. Aloe Vera Cooling Gel
Ingredients
- Fresh aloe vera gel
- 1 teaspoon cucumber juice
- 1 vitamin E capsule (optional)
How to Make
Blend all ingredients until smooth.
How to Use
- Apply a thin layer to the face or body.
- Leave on for 20 minutes or overnight.
- Refrigerate for an extra cooling effect.
Benefits
- Hydrates dry skin.
- Soothes skin after sun exposure.
- Leaves skin feeling refreshed.
- Supports a healthy skin barrier.
6. Rosemary Hair Rinse
Ingredients
- 2 tablespoons dried rosemary
- 2 cups water
How to Make
- Boil the water.
- Add rosemary.
- Simmer for 10 minutes.
- Cool and strain.
How to Use
- Pour over freshly washed hair.
- Massage gently into the scalp.
- Do not rinse out.
Benefits
- Refreshes the scalp.
- Adds natural shine.
- Supports healthy-looking hair.
- Leaves a pleasant herbal scent.
7. Turmeric Brightening Face Mask
Ingredients
- 1 teaspoon turmeric powder
- 2 tablespoons plain yogurt
- 1 teaspoon honey
How to Make
Mix all ingredients until creamy.
How to Use
- Apply a thin layer.
- Leave for 10–15 minutes.
- Rinse thoroughly.
Benefits
- Brightens dull-looking skin.
- Helps skin appear more even-toned.
- Moisturizes the skin.
- Provides antioxidant support.
8. Lavender Bath Soak
Ingredients
- 1 cup Epsom salt
- ½ cup baking soda
- 10 drops lavender essential oil
How to Make
Combine all ingredients in a dry container.
How to Use
- Add to warm bath water.
- Soak for 20 minutes.
Benefits
- Encourages relaxation.
- Helps soothe tired muscles.
- Softens skin.
- Creates a calming spa-like experience.
9. Cucumber Eye Pads
Ingredients
- 1 chilled cucumber
How to Make
Slice the cucumber into thin rounds.
How to Use
- Place slices over closed eyes.
- Relax for 15 minutes.
Benefits
- Refreshes tired eyes.
- Provides a cooling effect.
- Helps reduce the appearance of puffiness.
- Hydrates the delicate eye area.
10. Lemon and Honey Hand Softener
Ingredients
- 1 tablespoon honey
- 1 teaspoon lemon juice
- 1 teaspoon olive oil
How to Make
Mix until well combined.
How to Use
- Massage into hands.
- Leave for 15 minutes.
- Rinse with warm water.
Benefits
- Softens rough hands.
- Helps moisturize dry skin.
- Leaves hands smooth and refreshed.
- Supports healthier-looking skin.
Tips for Safe DIY Beauty Remedies
Always Patch Test
Apply a small amount to your inner arm and wait 24 hours before using a new remedy.
Use Fresh Ingredients
Fresh, high-quality ingredients provide the best results.
Store Properly
Homemade products without preservatives should be refrigerated and used within a few days to one week.
Be Consistent
Natural remedies generally require regular use over time for noticeable cosmetic benefits.
Frequently Asked Questions
Can I use these remedies every day?
Some, like aloe vera gel and green tea toner, can be used daily. Exfoliating scrubs and masks are generally best limited to once or twice per week.
Are DIY beauty remedies safe for sensitive skin?
Many people with sensitive skin can use gentle natural ingredients, but it’s important to patch test first and discontinue use if irritation occurs.
Can these remedies replace professional skincare products?
They can complement your skincare routine, but they may not replace products formulated for specific skin concerns or medical conditions.
How long do homemade beauty products last?
Most fresh DIY remedies should be stored in the refrigerator and used within 3–7 days unless they contain only shelf-stable ingredients.
Conclusion
Creating your own wellness and beauty remedies at home is a fun, affordable way to care for your skin and hair with simple natural ingredients. From moisturizing face masks and nourishing hair treatments to relaxing bath soaks and refreshing toners, these DIY recipes can easily become part of your weekly self-care routine. With consistent use, proper storage, and safe application practices, you can enjoy a relaxing beauty ritual while embracing the benefits of natural ingredients.
Part I: The Foundations of the Kitchen Apothecary
Before diving into recipes, one must understand the “building blocks.” Just as a chef relies on high-quality salt, fat, and acid, the DIY formulator relies on carriers, actives, and aromatics.
1. Carrier Oils (The Base)
Carrier oils are the foundation of almost every topical remedy. They are called “carriers” because they carry essential oils and other active ingredients into the skin.
- Jojoba Oil: Technically a liquid wax, jojoba closely mimics human sebum. This makes it ideal for almost all skin types, especially those prone to acne, as it can “trick” the skin into producing less oil.
- Sweet Almond Oil: A classic choice for body scrubs and massages. It is rich in Vitamin E and keeps skin cells healthy while protecting them from UV radiation damage.
- Coconut Oil (Fractionated vs. Virgin): Virgin coconut oil is solid at room temperature and great for deep conditioning hair masks. Fractionated coconut oil remains liquid and is better for roller-bottle blends and lightweight lotions.
- Rosehip Seed Oil: Known as “nature’s retinol,” it is packed with Vitamin A and essential fatty acids. It is the gold standard for anti-aging and scar reduction.
- Argan Oil: High in antioxidants and fatty acids, it’s the ultimate choice for hair health and evening out skin tone.
2. Butters and Waxes
These provide the texture and protective barrier for balms and creams.
- Shea Butter: Extracted from the nut of the African Shea tree, it is incredibly moisturizing and has anti-inflammatory properties.
- Cocoa Butter: Smells like chocolate and provides a thick, occlusive barrier. Perfect for preventing stretch marks and soothing dry heels.
- Beeswax (or Candelilla Wax for Vegans): This acts as the “glue” that hardens your balms and salves, providing a protective layer that locks moisture in while letting the skin breathe.
3. Essential Oils (The Actives)
Essential oils are the concentrated essence of plants. They provide scent, but more importantly, they provide therapeutic benefits.
- Lavender: The “Swiss Army Knife” of oils. It is calming, antibacterial, and helps heal burns or insect bites.
- Tea Tree: A powerful antifungal and antibacterial agent, perfect for acne and scalp health.
- Frankincense: Known for its skin-regenerating properties, it helps reduce the appearance of fine lines and sunspots.
- Peppermint: Cooling and invigorating, it’s excellent for muscle aches and mental clarity.
Part II: Facial Alchemy: Revitalizing Your Complexion
The face is the most sensitive area for DIY experimentation. The goal is to support the skin’s natural acid mantle rather than stripping it away with harsh detergents.
1. The Oil Cleansing Method (OCM)
The concept is simple: “Like dissolves like.” Using the right oils can dissolve the “bad” oils (sebum and makeup) without drying out the skin.
The Recipe:
- For Oily Skin: 30% Castor Oil, 70% Hemp Seed Oil.
- For Dry Skin: 10% Castor Oil, 90% Avocado Oil.
- For Combination Skin: 20% Castor Oil, 80% Jojoba Oil.
The Ritual: Massage a nickel-sized amount of the oil blend onto your dry face for 2 minutes. Focus on congested areas. Soak a washcloth in hot (not scalding) water, wring it out, and drape it over your face until it cools. This steams the pores open. Gently wipe the oil away.
2. The Honey Glow Wash
Raw honey is a natural humectant (it draws moisture into the skin) and contains enzymes that provide a very gentle exfoliation.
How to use: Simply take a teaspoon of raw, unpasteurized honey (Manuka is best, but raw local honey works wonders) and massage it into damp skin. Let it sit for 5-10 minutes as a mini-mask before rinsing with lukewarm water.
3. Botanical Toners and Mists
After cleansing, a toner helps reset the skin’s pH and provides a burst of hydration.
- The Soothing Rose Mist: Mix equal parts Rosewater (Hydrosol) and Witch Hazel (alcohol-free). Add two drops of Geranium essential oil. This balances sebum production and smells like a Victorian garden.
- The Clarifying ACV Toner: Mix 1 part raw Apple Cider Vinegar with 4 parts distilled water. This is excellent for restoring the acid mantle and clearing up acne. (Note: Always patch test ACV).
4. Custom Face Masks for Every Concern
- The Detox Mask (Clay-based): Mix 1 tbsp Bentonite clay with 1 tsp ACV and 1 tsp water. The clay carries a negative electrical charge, which helps “pull” positively charged toxins and heavy metals out of the pores.
- The Brightening Mask (Enzymatic): Mash 2 ripe strawberries (which contain salicylic acid) with 1 tbsp yogurt (which contains lactic acid). Apply for 15 minutes. The natural acids gently dissolve dead skin cells.
- The Hydration Bomb: Mash half an avocado with 1 tbsp honey and 1 tsp oats. This delivers healthy fats and soothing beta-glucans to irritated skin.
Part III: Body Rituals: From Head to Toe
The skin on our body is thicker than facial skin, allowing us to use more robust exfoliants and richer moisturizers.
1. The Himalayan Pink Salt Scrub
Salt scrubs are detoxifying and excellent for areas with rough skin, like elbows and knees.
Ingredients:
- 1 cup fine-grain Himalayan Pink Salt
- 1/2 cup Sweet Almond Oil
- 10 drops Grapefruit Essential Oil (for lymphatic drainage)
- 5 drops Rosemary Essential Oil
Application: Use in the shower, rubbing in circular motions toward the heart. This stimulates the lymphatic system and leaves the skin glowing.
2. Whipped Magnesium Body Butter
Magnesium is a vital mineral that many are deficient in. Absorbing it through the skin (transdermally) is one of the most effective ways to boost levels, aid sleep, and reduce muscle cramps.
Ingredients:
- 1/2 cup Shea Butter
- 1/4 cup Coconut Oil
- 1/4 cup Magnesium Oil (which is actually a brine of magnesium chloride flakes and water)
Process:
- Melt the shea butter and coconut oil in a double boiler.
- Let it cool until it starts to solidify but is still soft.
- Use a hand mixer to whip the oils.
- Slowly drizzle in the magnesium oil while whipping until the mixture is light, fluffy, and looks like marshmallow creme.
3. The Ultimate Detox Bath Soak
Bath time is the perfect opportunity to practice “passive wellness.”
The Recipe:
- 2 cups Epsom Salts (Magnesium sulfate)
- 1/2 cup Bentonite Clay (Mix with a little water first to avoid clumps)
- 1/4 cup Baking Soda (to neutralize chlorine in tap water)
- Dried Lavender buds and 10 drops of Lavender oil
The Benefit: The Epsom salts relax muscles, while the clay draws out impurities. This is the perfect remedy after a stressful day or a hard workout.
Part IV: Tress Transformation: Natural Hair Solutions
Commercial shampoos often use sulfates (industrial degreasers) that strip the scalp, leading to a cycle of over-oiliness and dryness.
1. The Apple Cider Vinegar (ACV) Rinse
This is the single most effective way to restore shine and manageability to hair. It smooths the hair cuticle, making it reflect light.
The Ratio: 2 tablespoons of ACV in 2 cups of water. Pour over hair after conditioning, let sit for a minute, and rinse with cool water. The “vinegar smell” disappears once the hair dries.
2. Deep Conditioning Rosemary & Castor Oil Mask
Castor oil is famous for stimulating hair growth by increasing blood flow to the scalp and providing omega-6 fatty acids.
The Recipe:
- 2 tbsp Castor Oil
- 1 tbsp Coconut Oil
- 5 drops Rosemary Essential Oil (studies show rosemary is as effective as minoxidil for hair growth over long-term use)
Instruction: Massage into the scalp and work through to the ends. Wrap hair in a warm towel for at least 30 minutes (or overnight) before washing out twice with a gentle shampoo.
3. Dry Shampoo for All Hair Colors
Stop using aerosol cans filled with butane and propane.
- For Blondes: Use 1/4 cup Arrowroot powder or Cornstarch.
- For Brunettes: Mix 2 tbsp Arrowroot powder with 2 tbsp unsweetened Cocoa powder.
- For Redheads: Mix Arrowroot powder with a pinch of Cinnamon or Hibiscus powder.
Add a few drops of essential oil for scent, and apply with an old makeup brush to the roots.
Part V: Hand and Foot Care
Our extremities work the hardest and are often the most neglected.
1. The “Green Thumb” Hand Salve
For those who garden or work with their hands, skin can become cracked and painful.
Ingredients:
- 1/4 cup Calendula-infused Olive Oil (Calendula is the king of skin healing)
- 1 tbsp Beeswax
- 1 tsp Vitamin E oil
Method: Melt together, pour into a tin, and let set. Use on dry knuckles and cuticles.
2. Peppermint Foot “Spa” Scrub
The feet have the largest pores on the body, making them very receptive to essential oils.
The Recipe:
- 1 cup Granulated Sugar
- 1/4 cup Olive Oil
- 10 drops Peppermint Oil
- 5 drops Tea Tree Oil
This scrub not only removes dead skin but also acts as an antifungal and cooling treatment for tired feet.
Part VI: Oral Care and Dental Health
The mouth is the gateway to the body’s overall health. DIY oral care focuses on maintaining a healthy microbiome rather than nuking all bacteria.
1. Oil Pulling (Ayurvedic Wisdom)
Oil pulling involves swishing oil in the mouth to remove bacteria and promote gum health.
How to: Take 1 tablespoon of organic virgin coconut oil. Swish it through your teeth for 15-20 minutes first thing in the morning. Do not swallow, as the oil is now full of bacteria. Spit it into a trash can (not the sink, as it can clog pipes) and brush your teeth as usual.
2. Remineralizing Toothpaste
Many DIY toothpastes lack the ability to support enamel. This recipe uses calcium-rich clays.
Ingredients:
- 4 tbsp Bentonite Clay
- 3 tbsp Coconut Oil
- 1 tbsp Calcium/Magnesium powder
- 1 tsp Stevia (for sweetness)
- 15 drops Peppermint Essential Oil
Mix into a paste. Use a small wooden spatula to apply to your brush (don’t use metal with bentonite clay, as it deactivates it).
Part VII: Internal Wellness: Tonics, Teas, and Elixirs
True beauty begins within. These remedies support the immune system, digestion, and skin clarity from the inside out.
1. The Golden Milk (Turmeric Latte)
Turmeric contains curcumin, one of the world’s most powerful natural anti-inflammatories.
The Recipe:
- 1 cup Almond or Coconut Milk
- 1 tsp Turmeric powder
- 1/2 tsp Cinnamon
- A pinch of Black Pepper (essential to activate the curcumin)
- A slice of fresh Ginger
- 1 tsp Honey
Heat gently on the stove. This is the perfect “sleepy time” drink that also fights systemic inflammation.
2. Fire Cider: The Immune-Boosting Tonic
Fire cider is a traditional folk remedy used to ward off colds and stimulate digestion.
Ingredients:
- Apple Cider Vinegar
- Horseradish root, Ginger root, Onion, Garlic
- Habanero peppers
- Lemon and Rosemary
Process: Chop the ingredients and place them in a glass jar. Cover completely with ACV. Let sit in a dark cupboard for 4 weeks, shaking daily. Strain out the solids and add honey to taste. Take a tablespoon a day during flu season.
3. Herbal Infusions vs. Teas
While a tea steeps for 3-5 minutes, an infusion steeps for 4-8 hours. This draws out the minerals from the plants.
- Nettle Infusion: High in iron and silica, great for hair and skin.
- Oatstraw Infusion: High in calcium and extremely soothing for the nervous system.
Part VIII: Aromatherapy and Emotional Wellness
Beauty isn’t just about how you look; it’s about how you vibrate. Stress is the primary “beauty thief,” causing cortisol spikes that lead to acne and collagen breakdown.
1. The “Peace of Mind” Rollerball
Ingredients:
- 10ml Roller bottle
- Fractionated Coconut Oil
- 5 drops Lavender, 3 drops Frankincense, 2 drops Bergamot
Apply to pulse points (wrists, temples, behind ears) during moments of high stress.
2. Room Sprays for Energy and Focus
Ditch the synthetic air fresheners which contain phthalates (hormone disruptors).
The “Focus” Spray:
- 2 oz Distilled Water
- 1 tbsp Witch Hazel
- 10 drops Lemon Essential Oil
- 10 drops Rosemary Essential Oil
Spritz around your workspace to clear brain fog and sharpen the mind.
Part IX: The Science of DIY: Safety, pH, and Preservation
To be a successful DIYer, you must understand the “rules” of the craft.
1. The Water Problem
As soon as you add water (or aloe vera juice, or herbal tea) to a product, you create an environment where bacteria, mold, and yeast can thrive.
- Oil-only products (balms, body oils) can last 6-12 months.
- Water-containing products without a professional preservative must be kept in the refrigerator and used within 5-7 days.
2. The Importance of pH
Our skin is naturally acidic (around 4.5 to 5.5). Using highly alkaline substances (like pure baking soda or bar soap) can damage the skin barrier. Always balance your formulas. If a mixture is too alkaline, a tiny drop of citric acid or ACV can bring it back to a skin-safe level.
3. Patch Testing
Even natural ingredients can cause allergic reactions. Always test a new remedy on the inside of your elbow and wait 24 hours before applying it to your face or body.
4. Photosensitivity
Certain essential oils, especially citrus oils (Lemon, Lime, Bergamot), are photosensitive. If you apply them to your skin and then go into the sun, they can cause severe burns or hyperpigmentation. Save citrus-based skincare for your nighttime routine.
Part X: Creating a Sustainable Sanctuary
Part of the DIY ethos is reducing waste.
1. Upcycling Glass
Never throw away a glass jar. Jam jars, spice jars, and old skincare containers can be sterilized in boiling water and reused for your DIY creations. Glass is superior to plastic because it doesn’t leach chemicals and doesn’t absorb the scent of essential oils.
2. Labeling Everything
It is a common mistake to think you will remember what’s in a jar. Always label with:
- The name of the product.
- The date it was made.
- The “Use By” date.
- Key ingredients (in case of allergies).
3. Gifting the Magic
DIY beauty products make incredible, personalized gifts. A “Spa in a Jar” (containing a mini scrub, a lip balm, and a bath soak) is often more appreciated than a store-bought set because it contains your time, energy, and care.
Part XI: Advanced Formulations: Stepping Up Your Game
Once you’ve mastered the basics, you can move into more complex textures.
1. The Emulsified Body Lotion
To create a “lotion” that doesn’t feel greasy, you must bind water and oil together using an emulsifying wax.
The Ratio:
- 70% Distilled Water (the “Water Phase”)
- 20% Carrier Oils (the “Oil Phase”)
- 5% Emulsifying Wax
- 5% Glycerin or Active Extracts
The Method: Heat the water phase and oil phase (with wax) in separate double boilers to 160°F. Pour the water into the oil and use an immersion blender to create a creamy, stable emulsion.
2. Herbal Oil Infusions (Solar Method)
Instead of just using plain olive oil, infuse it with dried herbs for 4-6 weeks in a sunny windowsill.
- Comfrey Infusion: For healing bruised skin and bones.
- Arnica Infusion: For muscle soreness.
- St. John’s Wort Infusion: For nerve pain and minor burns.
Part XII: A Seasonal Approach to DIY Wellness
Our skin and body needs change with the seasons. A DIY practitioner learns to listen to these cycles.
1. Spring: The Great Detox
Focus on lymphatic drainage and brightening. Use nettles, dandelion root tea, and citrus-based body scrubs to “wake up” the system after winter.
2. Summer: Protection and Hydration
Focus on cooling mists (Cucumber and Aloe) and soothing after-sun balms (Lavender and Peppermint). Increase water-rich foods and light, non-comedogenic facial oils like Hemp seed.
3. Autumn: Repairing Sun Damage
Introduce Rosehip oil and Vitamin C-rich masks to address hyperpigmentation from the summer sun. Begin using richer body butters as the air turns dry.
4. Winter: Deep Nourishment and Immunity
This is the time for heavy balms, lanolin-based hand creams, and immune-supporting Fire Cider. Use warming oils like Ginger and Cinnamon in your bath (diluted properly) to stimulate circulation.
Conclusion: The Journey Inward
Embarking on a DIY wellness journey is an act of radical self-care. It transforms your daily routine from a series of chores into a series of rituals. When you massage a face oil you blended yourself into your skin, you are not just moisturizing; you are connecting with the plants, the earth, and your own physical vessel.
The kitchen apothecary is a place of endless curiosity. There is always a new herb to infuse, a new scent profile to explore, and a deeper level of health to achieve. By removing the “middleman” of the beauty industry, you find that the most potent remedies aren’t found in a laboratory—they are found in the garden, the pantry, and the intuitive wisdom of your own hands.
As you move forward, start small. Replace one product at a time. Soon, you will look at your bathroom cabinet and see not a collection of plastic bottles and marketing promises, but a vibrant, living pharmacy that reflects the beauty of the natural world and the health of your own body. This is the art of living well, one handmade remedy at a time.